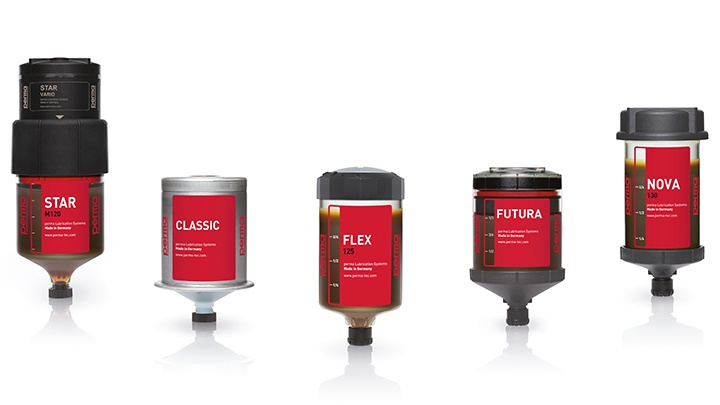
General information
There are 2 types of automatic greasers:
– A type greaser,
– Type B greaser.
Use the corresponding procedure.
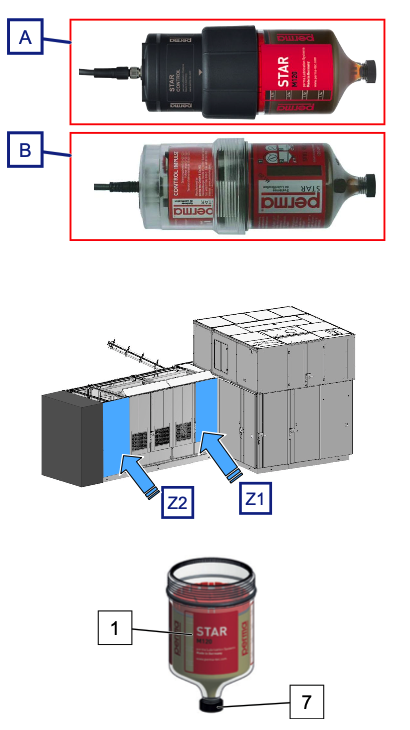
The oven is equipped with 2 automatic greasers in each access zone (Z1 ; Z2).
MACHINE CONDITION
– The machine is in a stopped state.
– The oven fan has stopped.
MATERIAL NEED
Piece
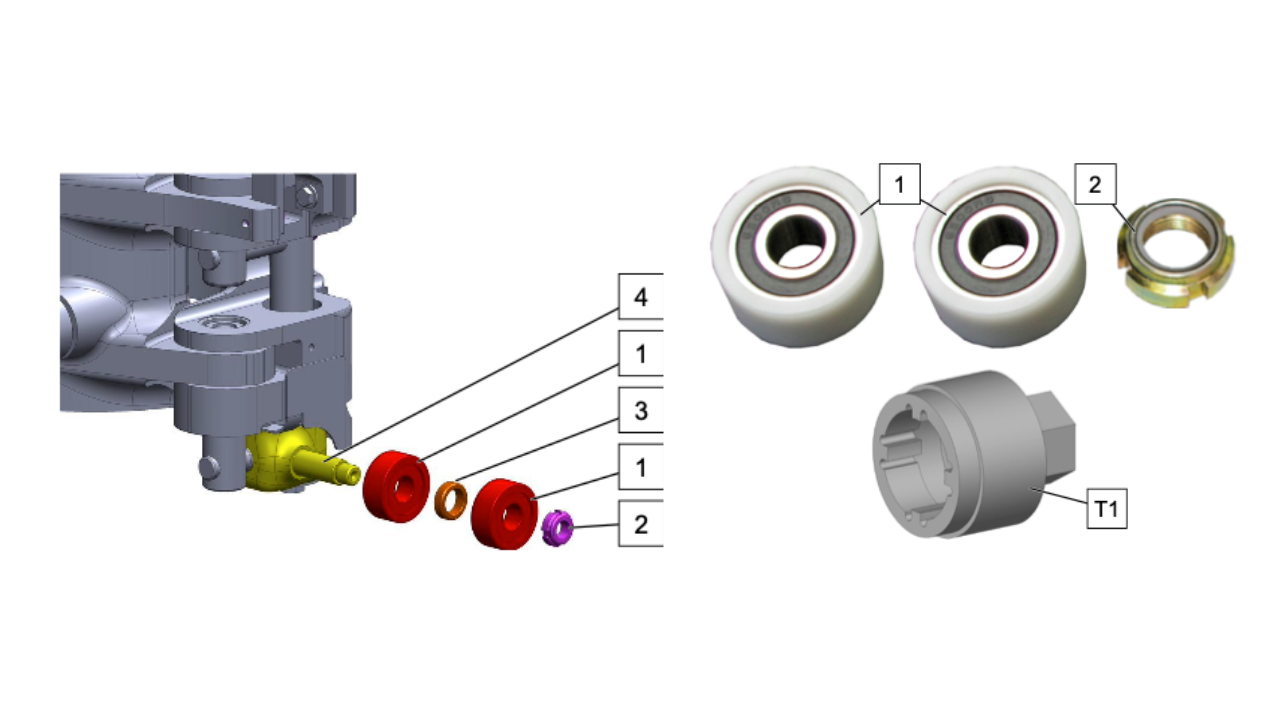
– Grease cartridge (1).
Consumable
– Clean and dry cloths.
PROCEDURE
A type greaser
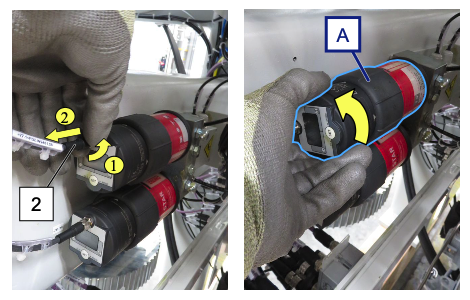
1. Each electrical connector (2) and associated automatic
Identify the connection between the greaser (A).
2. Loosen, then pull electrical connector (2).
3. Loosen and remove the automatic greaser (A) by hand.
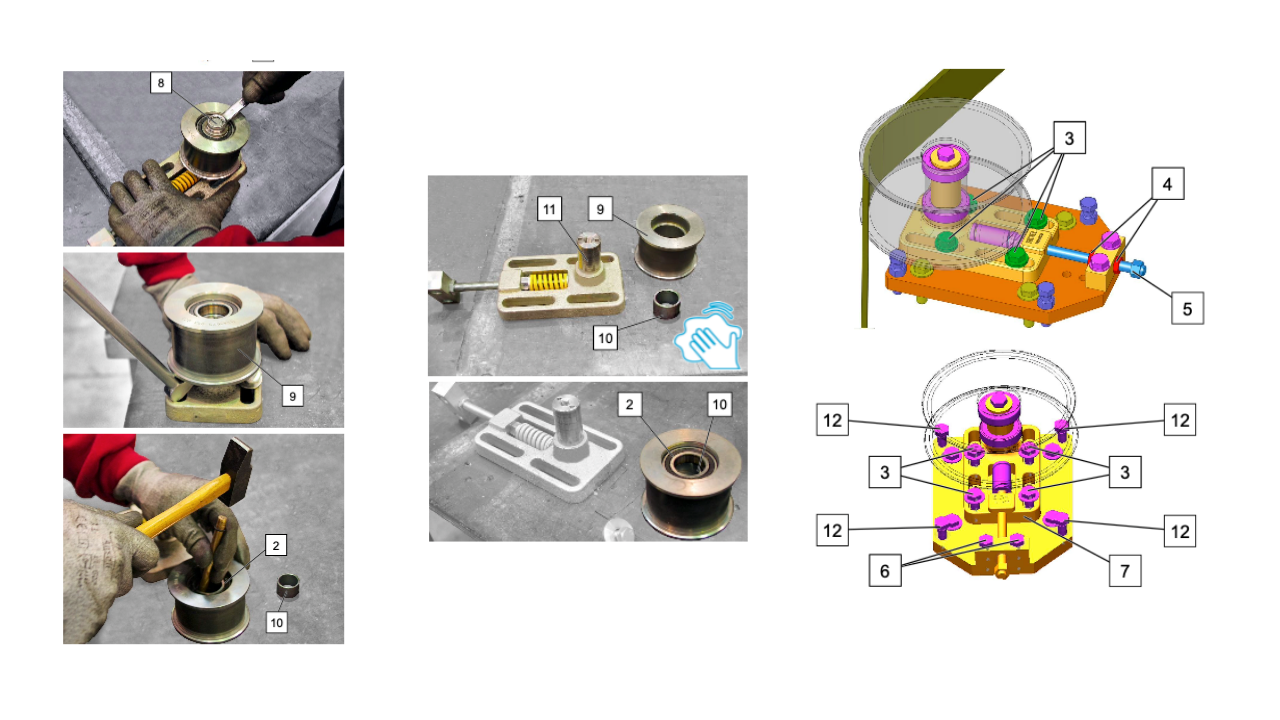
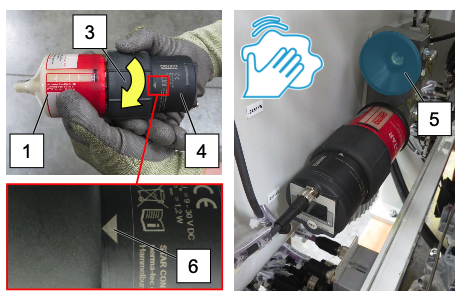
4. Loosen the ring (3) of the control unit (4).
Use the grease cartridge according to the laws in force.unload.
5. Clean the support (5) using a clean, dry cloth.
6. Place the control unit (4) on the new grease cartridge (1).
7. Tighten the ring (3) of the control unit (4).
Tighten the ring (3) to the (6) mark: arrow point.
9. Screw the automatic greasing unit (A) into the support (2) manually and at the normal rate.
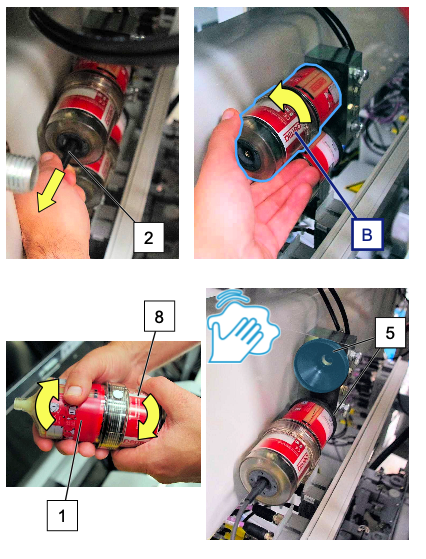
10. Insert and then tighten the electrical connector (2).
Obey the orientation of the pins of the electrical connector (2).
11. All automatic
Repeat the process until the greasers (A) cartridges (1) are replaced.
B type greaser
1. Each electrical connector (2) and its associated automatic
Identify the connection between the greaser (B).
2. Unlatch the electrical box (2) by pulling it on its axis.
3. Loosen and remove the automatic greaser (B) by hand.
4. Unscrew the cover (8) manually.
Empty the grease cartridge (1) in accordance with the laws in force.
5. Clean the support (5) using a clean, dry cloth.
6. Place the control unit (9) on the new grease cartridge (1).
7. Manually install the cover (8) and screw it on.
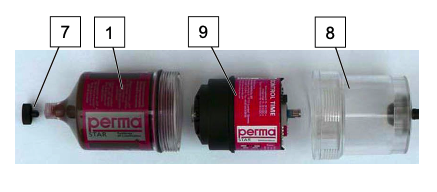
8. Remove the plug (7).
9. Screw the automatic greasing unit (B) into the support (5) manually and at the normal rate.
10. Latch the electrical connector (2).
Obey the orientation of the pins of the electrical connector (2).
11. All automatic
Repeat the process until the greasers (B) cartridges (1) are replaced.